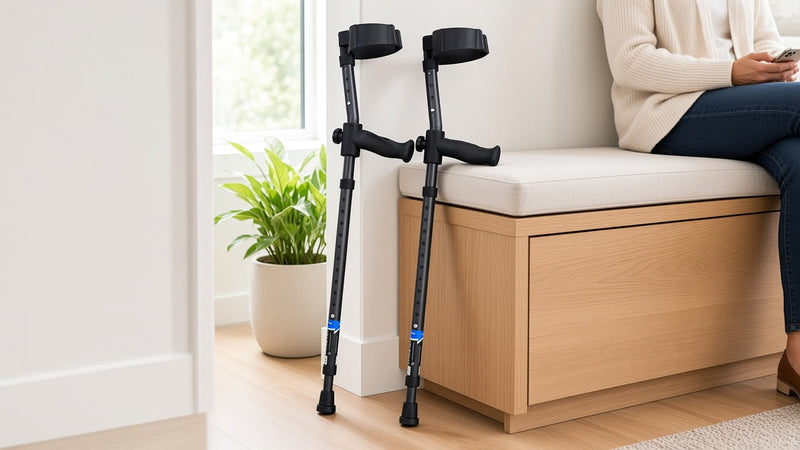
The featured image for this article was generated using AI.
Forearm crutches look simple: a handgrip, a cuff, and a straight shaft. Then you try to stand up from the couch with your arms already in the cuffs, or you get to the bottom of the stairs and realize you're not sure which foot goes first, and they suddenly feel a lot less simple.
The good news is that the technique is learnable with careful practice. Here's how to put them on, walk, sit, stand, and handle stairs, plus the small mistakes that leave people with sore wrists and elbows.
The short answer
To use forearm crutches, make sure they fit first: the handgrip should sit at wrist height when your arms hang relaxed, the cuff should sit just below your elbow, and both crutches should be set to the same height.
Once you're standing and balanced, slide each forearm into its cuff, hold the grips with the handles pointing forward, and place the crutch tips slightly in front of you and out to the sides. Then move the crutches and your injured leg forward together, push down through your hands, and step with your stronger leg.
Two rules cover most of the rest. Take your arms out of the cuffs before you sit down or stand up. And on stairs, lead with your stronger leg going up and with the crutch going down.
Always follow the weight-bearing instructions your surgeon or physical therapist gave you. The steps below are general and may differ from what your care team taught you.
Step 1: Check the fit before your first step
Most forearm crutch problems start with a crutch set to the wrong height. Stand up straight in the shoes you normally wear and check three things:
- Handgrip height: With your arms hanging relaxed at your sides, the grip should line up with your wrist. When you hold it, your elbow should have a slight bend, not be locked straight.
- Cuff position: The cuff should wrap around your forearm just below the elbow. It shouldn't press on the elbow joint itself.
- Matching heights: If you use two crutches, set them to the same height.
If a physical therapist already adjusted your crutches, ask them before you change the height. For a more detailed walkthrough, see What Are Lofstrand Crutches? The Forearm Crutch Guide and our crutch sizing guide.
Step 2: Put them on once you're standing
- Get standing and balanced first (see "Standing up" below).
- Slide one forearm into its cuff, then the other.
- Hold the grips with the handles pointing forward.
- Set the tips slightly in front of you and a little out to each side. That wide, forward base is what keeps you steady while you stand still.
Keep your shoulders relaxed and your eyes looking ahead, not down at your feet. Your weight goes through your hands on the grips. The cuff is there to keep the crutch in place on your arm, not to carry your weight.
Step 3: Walk to match your weight-bearing instructions
How you walk depends on how much weight your care team said you can put on the injured leg.
Non-weight-bearing (the injured foot stays off the floor)
- Hold the injured leg slightly in front of you with the knee a little bent, and keep the foot off the floor.
- Move both crutches forward about one step, level with each other and slightly apart.
- Push down through your hands and bring your body forward between the crutches, landing on your stronger leg.
- Get your balance, then repeat.
Hopping your stronger foot well past the crutches can feel faster, but it makes you less stable, especially at first. Our guide to the best crutches for non-weight-bearing covers what helps when your arms are doing all the work.
Partial weight-bearing
- Move both crutches forward one step.
- Step the injured leg forward to the crutches, putting only as much weight on it as you've been told is safe. Push down through the grips to take the rest.
- Step through with your stronger leg.
This pattern is often called a 3-point gait. Our 3-point gait guide breaks it down in more detail.
Walking with one forearm crutch
If your care team says you're ready for one crutch, hold it in the hand opposite your injured leg. Move the crutch and the injured leg forward together, support yourself through the crutch, and then step your stronger leg through. See One Crutch or Two? for how people usually make that transition.
Turning
Turn with small steps or small hops. Don't try to pivot or swing around in one quick motion, since that's an easy way to lose your balance.
Step 4: Standing up and sitting down
This is the part people most often get wrong with forearm crutches. Don't stand up or sit down with your arms still in the cuffs. If you push off with your arms locked into the cuffs, you can strain your elbows or shoulders, and the crutches can twist under you.
Standing up
- Scoot to the front edge of the chair.
- Put the two crutches together side by side and hold both handles in one hand. Some hospital guides call this the "H" position.
- Put your other hand on the arm of the chair.
- Lean forward and push up with your stronger leg and the hand on the chair arm. Don't push up on the crutches.
- Once you're balanced, put your arms into the cuffs one at a time.
Sitting down
- Walk close to the chair and turn slowly until you can feel it against the back of your legs.
- Take your arms out of the cuffs one at a time.
- Hold both handles together in one hand.
- Reach back for the arm of the chair with your free hand, lean forward a little, and lower yourself slowly.
A sturdy chair with arms and a higher seat makes both moves easier.
Step 5: Stairs with forearm crutches
Stairs are where going slowly matters most. Use a handrail whenever there is one, and have someone nearby the first few times if you can.
Going up
- Hold the handrail with one hand and one crutch in the other hand.
- Carry the spare crutch horizontally in the fingers of the hand that holds the working crutch.
- Step up with your stronger leg first.
- Bring the injured leg up to the same step (or keep it lifted if you're non-weight-bearing).
- Bring the crutch up last.
Going down
- Put the crutch down on the step below first, and slide your hand a little way down the rail.
- Take some weight through the crutch and the rail, then lower the injured leg to the step (or hold it out in front of you, off the step, if you're non-weight-bearing).
- Step down with your stronger leg.
An easy way to remember it: the stronger leg goes up first, and the crutch goes down first. If there's no handrail, use both crutches in the same order. If stairs feel unsafe, sitting and moving up or down one step at a time on your bottom is a perfectly good option. For curbs, ramps, and uneven ground, see Stairs, Curbs & Uneven Terrain.
Common forearm crutch mistakes
- Standing up or sitting down with your arms in the cuffs. Take them out first, every time.
- Crutches set too tall. If your elbow is locked straight or your shoulders hike up toward your ears, lower the grips.
- A cuff riding on the elbow. The cuff belongs just below the elbow, not on the joint.
- Bending your wrist back to bear weight. Keep your wrist straight over the grip. If your hands or palms hurt, our guide to hand and palm pain from crutches walks through fixes.
- Taping or padding the handgrips. At least one hospital guide advises against adding padding to forearm crutch handles. If the grip hurts, check the fit or ask about a different grip.
- Looking at your feet. Look ahead, and let the crutch tips find the floor.
- Worn tips. Check the rubber tips regularly and replace worn or split ones. Here's how to tell when crutch tips need replacing.
Practical steps for your first day
- Check the fit in your everyday shoes before you walk anywhere.
- Clear your main paths: pick up throw rugs, cords, and clutter, and add a nightlight between the bedroom and bathroom.
- Wear supportive, flat shoes, and be careful on wet floors, ice, and wet leaves.
- Practice standing up and sitting down a few times with someone nearby.
- Practice stairs with your physical therapist or a helper before you try them alone.
- Carry things in a backpack, fanny pack, or apron with pockets so both hands stay on the grips.
- Don't use a crutch that seems bent, cracked, or damaged.
A quick note on our crutches
Here's how the in-Motion Pro Forearm Crutches line up with the points above.
The grips are shaped for your left and right hands and angled to keep your wrist in a natural position, so make sure the left grip is in your left hand and the right in your right.
Every box includes both a standard and a large forearm cuff, in both the Short and Tall sizes, so you can get a snug fit just below the elbow. The semi-closed cuff is easy to slip into and lets you go hands-free for a moment, for example to open a door, while the crutch stays on your arm.
The lower post has a patented spring that absorbs the shock of each step, and the Sure-Foot articulating tips pivot to keep contact with the ground. If you'd rather not have a spring, there's also a Rigid Post version.
Sizing goes by your floor-to-hip measurement in your usual shoes: Short fits adults 4'2" to 5'5" (23.5" to 33.5" floor to hip), and Tall fits users 5'3" to 6'8" (28.5" to 42.5" floor to hip).
They hold up to 350 lbs, weigh 1.8 lbs per crutch, come with a 1-year warranty, are FSA/HSA eligible, and ship free. If you only need one, there's a single forearm crutch as well.
When you sit down, the in-Motion Handy Clip snaps the pair together so they stay put instead of sliding to the floor.
Frequently asked questions
Are forearm crutches harder to use than underarm crutches?
They usually take a little more practice, because your arms and hands do more of the balancing. Whether that learning curve is worth it often depends on how long you'll need crutches. Our comparison of forearm vs. underarm crutches covers the tradeoffs, and your physical therapist can help you decide.
Where should the cuff sit on my arm?
Just below the elbow, around your forearm. If it presses on the elbow joint or sits above it, the crutch needs adjusting or you may need a different cuff size.
Should my elbow be straight when I use forearm crutches?
No. When you hold the grip, your elbow should have a slight bend. A locked, straight elbow usually means the crutch is too tall.
Which hand do I use with one forearm crutch?
The hand opposite your injured leg. If your right leg is injured, the crutch goes in your left hand, and it moves forward together with the injured leg.
Can I let go of the handle while wearing forearm crutches?
Briefly, yes. The cuff keeps the crutch on your arm, so you can free a hand to open a door or grab a railing. Only do it while you're standing still and steady, and put your hand back on the grip before you take a step.
Can I go up and down stairs with forearm crutches?
Yes, once your care team says it's OK. Use the handrail, lead with your stronger leg going up and with the crutch going down, and take one step at a time.
Related guides
- What Are Lofstrand Crutches? The Forearm Crutch Guide
- Forearm Crutches vs. Underarm Crutches: What Nobody Tells You Before Surgery
- Best Forearm Crutches of 2026: An Honest Comparison
- 3-Point Gait on Crutches: How It Works and What Most Patients Get Wrong
- Stairs, Curbs & Uneven Terrain: Real-World Crutch Skills
- Hand and Palm Pain From Crutches: Why It Happens and How to Fix It
Sources: South Tees Hospitals NHS Foundation Trust, How to use elbow crutches; University Hospitals Coventry and Warwickshire NHS Trust, Using elbow crutches; University Hospitals Sussex NHS Foundation Trust, Using elbow crutches; University Hospitals Dorset NHS Foundation Trust, How to use your elbow crutches; American Academy of Orthopaedic Surgeons (OrthoInfo), How To Use Crutches, Canes, and Walkers; Cleveland Clinic, How To Use Crutches. Product specifications are from crutches.com product pages as of October 27, 2026.
This article is for general information only and isn't medical advice. Talk with your doctor or physical therapist about your weight-bearing instructions and how to use your crutches safely.